Understanding the Kitchen Cabinet Refinishing Process
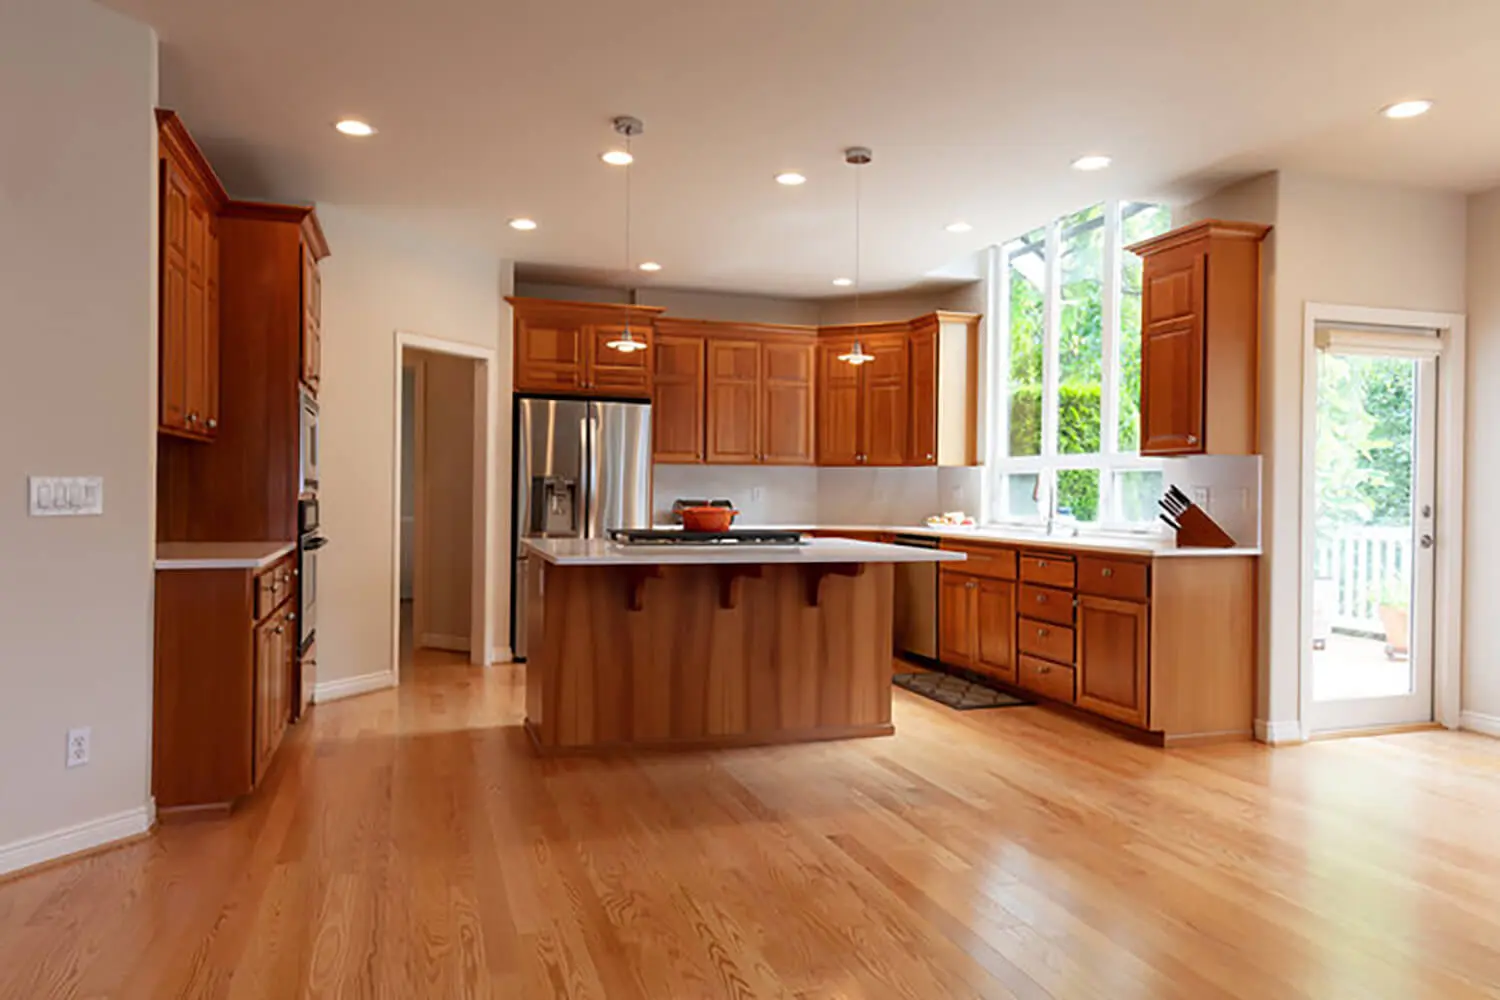
If your kitchen cabinets feel dated, you might be ready for an update, but not a full renovation. Cabinet replacement is expensive, disruptive, and often more work than most homeowners want to take on. That’s why cabinet refinishing is such a popular option.
But before you move forward, you probably want to understand what the kitchen cabinet refinishing process actually involves.
How long does it take? What happens to your kitchen while the work is going on? And what should you expect at each stage so the project feels predictable instead of stressful?
Cabinet refinishing isn’t just a quick coat of paint. It’s a step-by-step process that includes careful prep, controlled finishing, and detailed reinstall work to make sure the final result looks smooth and holds up to daily use.
In this breakdown, you’ll learn what the typical kitchen cabinet refinishing process looks like from start to finish, so you can plan ahead, set realistic expectations, and feel confident about what’s happening in your home.
How Long Cabinet Refinishing Usually Takes (And What Can Slow It Down)
Most cabinet refinishing projects take about 5–10 days from start to finish, depending on the size of the kitchen and how much prep work is needed.
Smaller kitchens with fewer doors and drawer fronts may fall closer to the 4–6 day range.
Larger kitchens, older cabinets, or projects with heavier prep needs often land closer to 7–12 days.
The timeline usually depends on a few key factors:
- The number of doors and drawers being refinished
- How much cleaning, sanding, and repair work is required
- Drying and curing conditions between coats
- The complexity of the kitchen layout and cabinet details
Even when the process is moving efficiently, refinishing still includes built-in waiting periods.
Coats need time to dry properly, and rushing that stage can lead to finish problems later.
Some projects run longer for common reasons, such as:
- Heavy grease buildup that takes longer to remove
- Older cabinets with multiple layers of paint or finish
- Hidden damage found during prep, like worn edges or loose panels
- Last-minute changes to the color, sheen, or scope of work
If you’re planning around cooking and daily routines, it helps to assume the project will take about a week, with a little extra buffer if your cabinets are older or need repairs.The key takeaway is that timelines vary, but the process is predictable when it’s planned well.
Where Cabinet Refinishing Starts (And Why This Part Matters)
Most cabinet refinishing projects begin with an initial visit or consultation, where the goal is to confirm that refinishing is the right fit for your cabinets and your kitchen.
This first step matters because it sets the foundation for everything that happens next.
If the cabinets aren’t a good candidate for refinishing, it’s better to know that early instead of discovering issues halfway through the project.
During this first visit, pros typically check things like:
- What the cabinets are made of (and whether they can be refinished well)
- The condition of the doors, drawers, and cabinet boxes
- Any visible damage, wear, or peeling areas
- Previous coatings that may affect prep and adhesion
This is also where finish goals get clarified.
Most homeowners have a specific look in mind, whether that’s a painted finish, a stain-style look, a certain sheen level, or a more durable option for heavy-use kitchens.
Before any work begins, a few key details usually get decided up front:
- What’s included in the scope – This may involve doors and drawer fronts only, or also include cabinet boxes, trim pieces, and surrounding details.
- Color selection and finish style – This includes confirming the exact color, sheen, and overall look, so there are no surprises once the finish is applied.
- Timeline expectations and kitchen use – You’ll also talk through how long the project may take and what access will look like while work is happening, so you can plan around your routine.
When the project starts with clear decisions, the refinishing process feels far more predictable from day one.
Protecting the Kitchen Before Anything Comes Off
Before doors come down or sanding begins, the kitchen is usually set up and protected like a work zone.
This step might not look exciting, but it’s what keeps the rest of your home clean and helps the project run smoothly.
Most of the protection is focused on the areas closest to the cabinets, including:
- Floors and baseboards
- Countertops and backsplashes
- Appliances and nearby surfaces
- Entryways, hallways, or adjacent rooms that connect to the kitchen
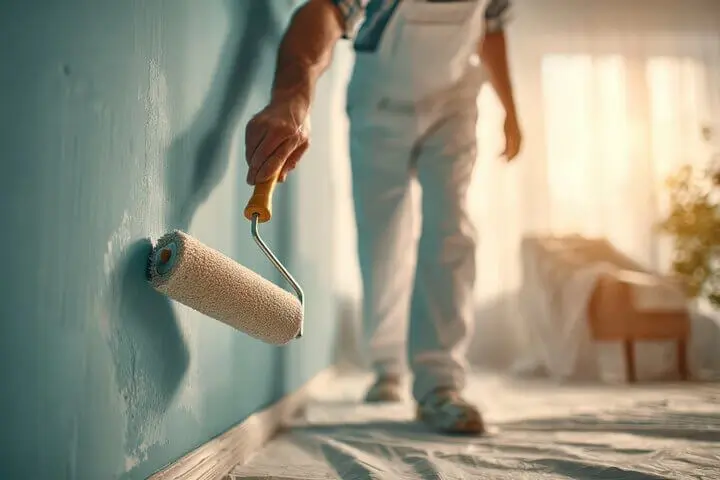
This type of setup is similar to what’s used during interior painting projects, where protecting nearby surfaces is just as important as the finish itself.
Containment matters because cabinet refinishing can create dust, especially during sanding and prep work.
Even when a crew is careful, fine particles can travel easily if the space isn’t sealed off properly.
This is also about keeping the kitchen safe and usable.
A protected work area reduces the chance of damage to your floors or counters and helps prevent debris from getting into places it shouldn’t.
As this stage happens, homeowners can usually expect:
- Drop cloths or floor coverings placed throughout the work zone
- Plastic sheeting or taped barriers in key openings
- Cabinets and counters covered where needed
- A clear “work area” set up so tools and materials stay contained
Once everything is protected and the space is prepared, the crew can move into removal and prep work without worrying about damaging the kitchen around it.
Removing Doors, Drawers, and Hardware
After the kitchen is protected, the next step is removing the cabinet components that will be refinished.
This usually includes cabinet doors, drawer fronts, and hardware like hinges and pulls.
Each piece gets removed carefully so the finish work can be done evenly and the reinstallation goes back smoothly.
To avoid mix-ups later, professionals typically label everything as it comes off.
That means each door and drawer front is tracked so it returns to its original location, even if several pieces look identical at first glance.
This labeling step helps prevent common reinstall issues like:
- Doors being swapped into the wrong spots
- Misaligned spacing that looks uneven
- Hardware not matching the correct door or hinge location
Most of the time, the cabinet boxes stay in place.
The structure of the cabinets doesn’t need to be removed for refinishing, which is one of the main reasons this project is far less disruptive than replacing cabinets entirely.
At this stage, homeowners can expect the kitchen to look temporarily unfinished.
Doors will be off, drawers may be partially removed, and some areas may be limited for use. That’s normal, and it’s a sign the project is moving into the heavy prep and finishing work that determines how the final result will look.
Prep Work: Cleaning, Sanding, Repairs, and Priming
This is the phase that makes or breaks the final result. Cabinet refinishing only looks smooth and professional when the surface underneath is clean, stable, and properly prepared to hold the new finish.
Even the best paint or coating won’t hold up if it’s applied over grease, gloss, or uneven wear.
Prep work usually starts with deep cleaning. Kitchen cabinets collect residue over time, especially around handles, above the stove, and near cooking areas. Before anything else can happen, that buildup has to be fully removed so the finish can bond properly.
Once the cabinets are clean, sanding comes next. Sanding isn’t just about removing the old color. It’s about creating a surface the new finish can grip, especially if the existing cabinets have a glossy or sealed coating.
After sanding, repairs and surface corrections are handled. This might include:
- Filling dents or small chips
- Smoothing worn corners and edges
- Fixing rough areas where old paint is failing
- Addressing minor damage that would show through the finish
Then priming is done to lock everything in. Primer helps with adhesion, blocks stains or wood tannins from bleeding through, and creates a consistent base so the final coats look even.
Some cabinets move through prep quickly. Others take longer because the condition is tougher than it looks at first.
Prep usually takes more time when:
- Cabinets have heavy grease buildup
- Older finishes include multiple layers underneath
- The wood surface is rough or uneven
- Damage is discovered once sanding begins
If cabinet refinishing feels “slow” at this stage, that’s usually a good sign. Rushed prep is one of the biggest reasons cabinets start chipping or peeling early, so this part of the process is where durability is built.
Painting or Spraying the Finish Coats
Once prep and priming are complete, the cabinets are ready for finish coats. This is the stage most homeowners think of when they picture refinishing, but it only works well because the surface has been properly prepared beforehand.
In most professional cabinet projects, doors and drawer fronts are sprayed for the smoothest result. Spraying creates a more even finish than brushing or rolling, especially on flat panels and detailed edges.
It also helps the final surface look consistent across every piece, which is one of the biggest differences between a professional job and a rushed one.
During this part of the kitchen cabinet refinishing process, homeowners can expect a few things to happen in a controlled sequence:
- Multiple coats are applied for coverage and durability
- Each coat is given proper dry time before the next one goes on
- Doors and drawers are finished to match evenly, without blotchy areas or uneven sheen
The time this stage takes depends on the details of the project. A simple color with standard coverage may move faster, while darker colors or specialty finishes often require additional coats for full consistency.
A few factors can slow down the finish-coat stage:
- Number of coats needed – Some colors cover quickly, while others take more layers to look uniform.
- Dry time and curing conditions – Even when paint is applied efficiently, it still needs time to set between coats.
- Darker colors or specialty looks – Deep tones, high-sheen finishes, or certain custom looks may require extra steps to achieve a clean result.
This part of the project is where the kitchen starts to look “new” again. But it’s also where patience matters, because the finish needs time to dry properly before it can handle reinstall and daily use.
Curing Time and Handling Rules (So the Finish Doesn’t Get Ruined Early)
One of the most important parts of cabinet refinishing happens after the paint is already on. Even when cabinets feel dry to the touch, the finish is still curing underneath the surface. This is where many homeowners accidentally damage the result without realizing it.
“Dry” and “fully cured” aren’t the same thing. Dry to the touch means the surface can be lightly handled.
Fully cured means the finish has hardened enough to resist everyday friction, impact, and cleaning.
Curing takes time, and the timeline depends on the type of coating used and the conditions in the home.
During the early curing period, it’s best to treat the cabinets gently. That usually means avoiding things like:
- Harsh cleaners or scrubbing
- Slamming doors or forcing sticky drawers
- Hanging wet towels over cabinet edges
- Stacking heavy items too soon inside drawers or cabinets
Small habits can make a real difference in durability. A finish that’s still curing is easier to dent, scratch, or peel if it gets bumped repeatedly or cleaned too aggressively.
This doesn’t mean you can’t use your kitchen. It just means using it with a little more care in the first couple of weeks.
If you follow the recommended handling rules, the finish has the best chance to harden properly and hold up long-term.
Patience here protects the entire investment. It’s one of the simplest ways to make sure your refinished cabinets keep looking smooth and clean well after the project is complete, rather than breaking down early in ways similar to what happens when homeowners notice fading paint on an exterior.
Reinstalling Doors, Hardware, and Final Touch-Ups
Once the finish has had enough time to set, the project moves into reinstall. This is the stage where everything starts coming back together and the kitchen feels “normal” again.
Doors and drawer fronts are returned to their original locations, based on the labeling done at removal. That step matters more than most homeowners realize, because it keeps spacing consistent and prevents mismatched alignment.
Hardware is then reinstalled. In some kitchens, the original hinges and pulls go back on. In others, new hardware is added, which can slightly change the feel and look of the cabinets even without changing the layout.
During reinstall, professionals usually make small adjustments so the cabinets function smoothly, including:
- Aligning doors so gaps look even
- Adjusting hinges so doors open and close cleanly
- Making sure drawers slide properly without rubbing
After everything is installed, final touch-ups are completed.
These are small but important, and often include:
- Edge corrections in high-contact spots
- Minor fixes near hinge zones
- Small coverage adjustments in corners or along trim
A final walkthrough usually happens at the end of this stage. This is when the crew checks that the finish looks uniform, doors and drawers function properly, and the kitchen is cleaned up so the space feels reset.
At this point, the project should look complete, feel smooth to use, and be ready for normal day-to-day routines.
How to Know the Finish Came Out Right
At the end of a cabinet refinishing project, the cabinets should look clean, feel smooth, and function the way they’re supposed to.
Even if you don’t know what to look for technically, a quality result is usually obvious once the kitchen is put back together.
A refinished cabinet job done right should have a finish that looks consistent from every angle.
That typically means:
- Smooth surfaces with an even sheen
- Clean edges without heavy buildup or rough spots
- Consistent coverage across doors, drawers, and trim
- No obvious patchiness, streaking, or uneven areas
The cabinets should also function properly. A beautiful finish doesn’t matter much if the doors don’t close evenly or the drawers stick.
After reinstall, things should feel aligned and intentional, including:
- Doors hanging straight with even spacing
- Drawers sliding smoothly
- Hardware sitting firmly in place without wobble
Homeowners should also walk away knowing how to care for the finish.
That includes understanding what products to avoid early on, and how long it may take for the coating to fully harden.
The first few weeks matter because the finish is still curing. During that time, it’s normal to treat the cabinets a little more gently while the coating reaches full durability.
If the cabinets look uniform, feel smooth, and work the way they should, that’s the sign the refinishing process was done correctly from start to finish.
Conclusion: Cabinet Refinishing Is Smoothest When the Process Is Planned Up Front
Cabinet refinishing isn’t just “painting cabinets.” A professional kitchen cabinet refinishing process depends on solid prep work, controlled dry time, and careful reinstall so the finish looks smooth and holds up to daily use.
Timelines vary, but the stages stay consistent. When the scope, color, and expectations are decided up front, the project feels far more predictable from start to finish.
The best results come from letting the finish cure properly and following the recommended handling guidelines in the first couple of weeks.
If you want a clear quote and timeline for your kitchen, get a free estimate from Refined Painting to evaluate your cabinets and walk you through what refinishing would look like in your space, based on your layout, cabinet condition, and desired finish.